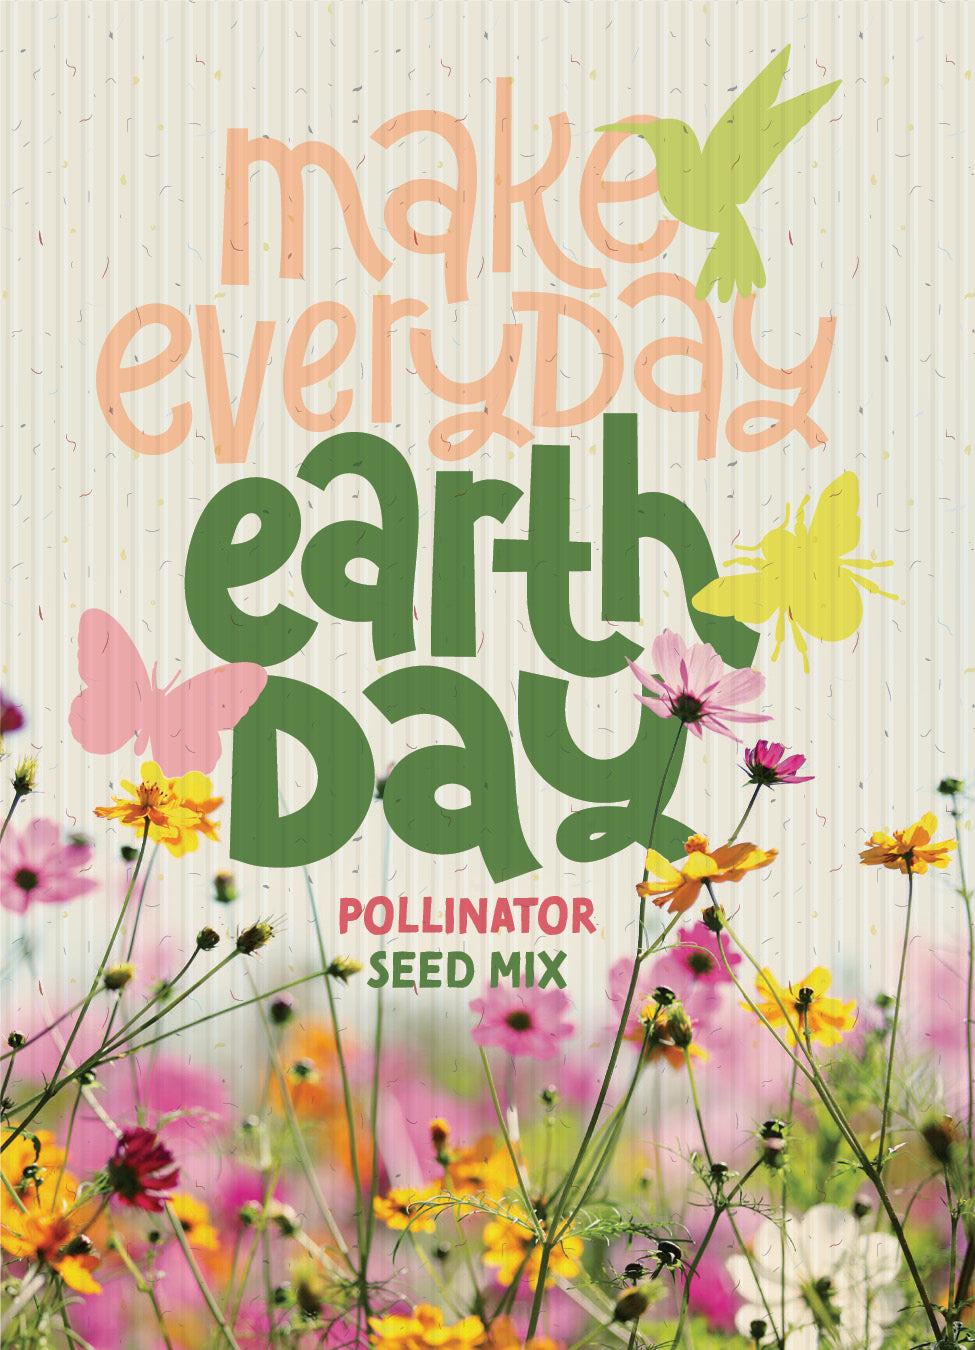
Make Everyday Earth Day - Pollinator Flower Mix Seed Packets
Celebrate Earth Day every day with these eco-friendly wildflower seed packets! Perfect for Earth Day favors, these charming packets feature butterflies, hummingbirds, bees, and a vibrant garden-inspired design. Made with recycled materials, they’re ideal for gifting to clients, coworkers, teachers, students, friends, and family.
When planted, this pollinator-friendly flower seed mix grows into a beautiful garden that attracts and supports bees, butterflies, hummingbirds, and other pollinators, making it a thoughtful and sustainable Earth Day gift. Great for classroom activities, corporate events, giveaways, and eco-friendly celebrations.
Key Features:
Butterfly, bee, and hummingbird design
Wildflower mix to grow a pollinator garden
Made with recycled, eco-friendly materials
Perfect for Earth Day favors, gifts, or giveaways
Supports bees, butterflies, birds, and other pollinators
Earth Day is April 22.
This packet will cover approximately 10 square feet of space.
Packet size: 3 ¼" x 4 ½"
Pollinator MixWildflower Planting Directions:
Prepare a bed of loose soil. Sprinkle seeds in prepared area and cover loosely with soil. Keep the area moist until the plants are about 6” tall. It really is that easy!
Earth Day Seed Packets – Pollinator-Friendly Flower Mix
Our most popular Earth Day seed packet design is back! These vibrant packets grow a colorful wildflower garden that delights bees, butterflies, hummingbirds, and other pollinators. Perfect for celebrating Earth Day (April 22), these eco-friendly packets are ideal for event favors, student gifts, corporate giveaways, or thank-you gifts for clients, coworkers, teachers, friends, and family.
The design features a cheerful illustrated planet Earth surrounded by flowers, bees, and butterflies on an ocean-blue background. Each packet contains a pollinator-friendly flower seed mix that is easy to plant and quick to grow, helping support local wildlife while adding beauty to any garden.
Use the space on the back to write a personalized message or add a label with your logo and contact info, making these packets a thoughtful, customized gift.
Key Features:
Vibrant Earth Day design with flowers, bees, and butterflies
Pollinator-friendly flower seed mix for easy planting
Perfect for Earth Day favors, giveaways, and gifts
Customizable back for messages or branded labels
Supports bees, butterflies, hummingbirds, and other pollinators
This packet will cover approximately 10 square feet of space.
Pollinator Mix Wildflower Planting Directions: Prepare a bed of loose soil. Sprinkle seeds in prepared area and cover loosely with soil. Keep the area moist until the plants are about 6" tall. It really is that easy!
Earth Day Promotion Seed Packet Card with Butterfly Art and Pollinator Mix Wildflower Seeds
Give back to nature this Earth Day with this gorgeous mix! It provides nectar and pollen to honey bees, wild bees, hummingbirds, butterflies, and other pollinators. Earth Day is April 22!
Our pollinator mix Earth Day promotion card has a beautiful floral and butterfly design. This packet would be a thoughtful favor for the eco-conscious host!
Send an eco-friendly greeting by using this packet in one of our Seed Packet Greeting Cards!
Grow Good Things with our Pollinator Mix packet has a whimsical watercolor-style floral and butterfly art.This sweet, illustrated, kraft-look packet would be a thoughtful favor for the eco-conscious host!
Use the space provided on the back of the packet to write your own personalized message.
This wildflower mix provides nectar and pollen to honey bees, wild bees, hummingbirds, butterflies, and other pollinators.
This packet will cover approximately 10 square feet of space.
Pollinator MixWildflower Planting Directions -
Prepare a bed of loose soil. Sprinkle seeds in prepared area and cover loosely with soil. Keep the area moist until the plants are about 6" tall. It really is that easy!
Here at Bentley Seed, we only fill our seed packets with the freshest crop NON-GMO seed in our 3rd generation family-owned small business in upstate NY! Our packets are hand-picked for you!
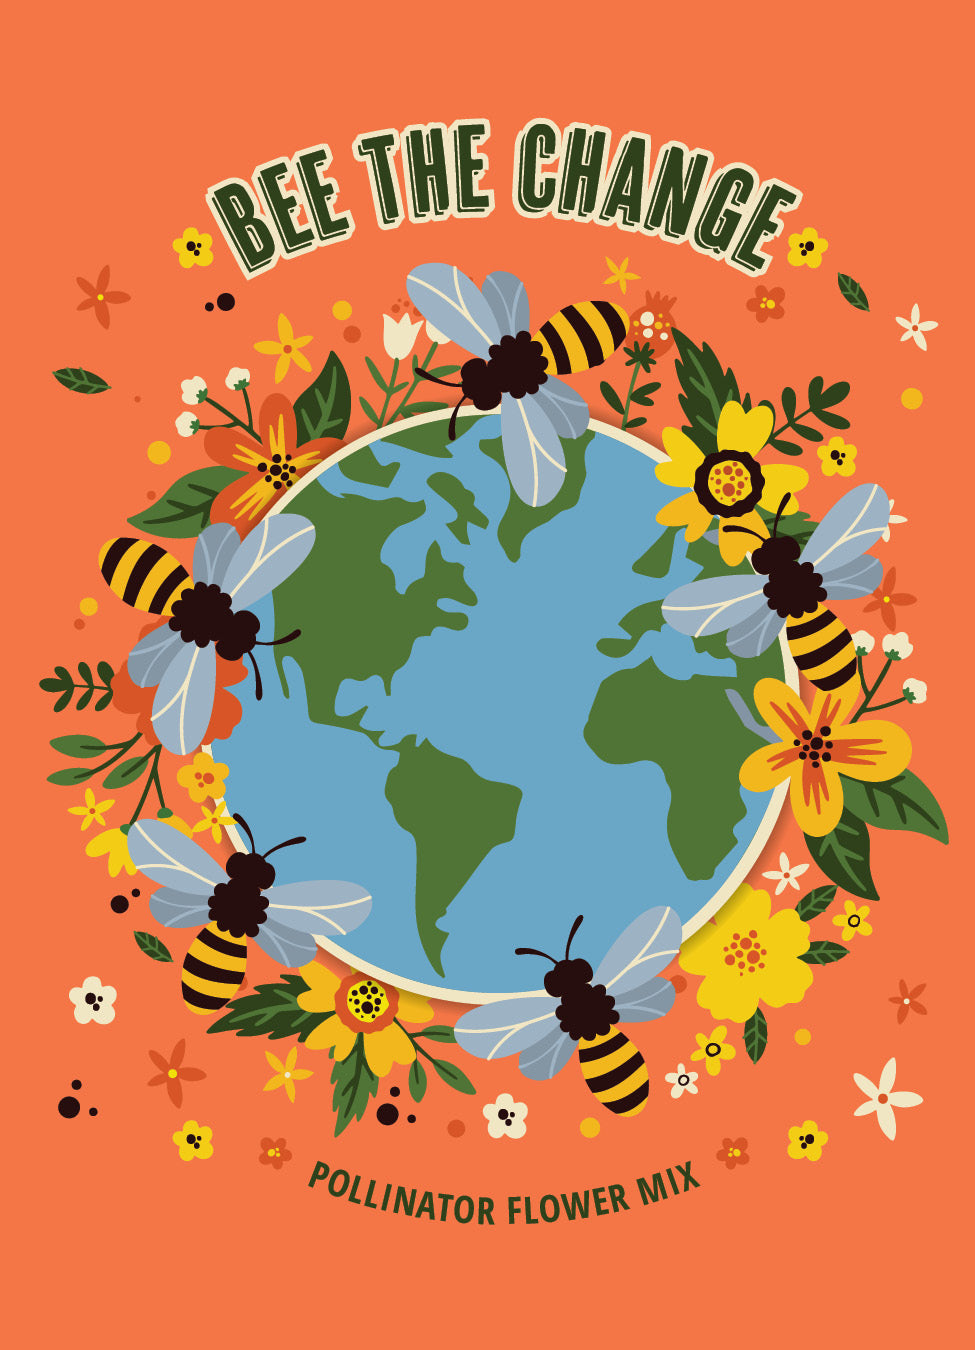
Bee the Change Seed Packets – Pollinator-Friendly Wildflower Mix
Make a difference this Earth Day or any event with our exclusive orange “Bee the Change” seed packets! Featuring an inspiring earth, honey bees, and yellow flowers design, these eco-friendly packets are perfect for handing out to clients, customers, coworkers, teachers, students, friends, and family.
Global populations of honeybees and other pollinators are declining but you can help by creating a pollinator-friendly garden in your own backyard. Each packet contains Bentley Seeds’ wildflower mix, designed to grow a vibrant garden that provides food and habitat for bees, butterflies, birds, and other winged creatures.
The back of each packet includes space for a personalized message or a label with your logo and contact information, making these packets perfect for corporate giveaways, school programs, community events, and eco-conscious gifts. Each packet covers approximately 10 square feet, offering a meaningful, affordable, and sustainable gift that makes a real impact.
Perfect for:
Corporate events and client gifts
School and classroom handouts
Community gatherings and environmental campaigns
Eco-conscious personal gifts for friends and family
Key Features:
Orange “Bee the Change” Earth-inspired design
Pollinator-friendly wildflower seed mix
Supports honeybees, native bees, butterflies, birds, and other pollinators
Personalized back for messages or branded labels
Covers ~10 sq. ft. per packet
Growing Instructions
In prepared garden bed, scatter seeds thinly over soil
Lightly press seeds into soil, do not bury deeply
Keep area moist until seedlings are well established
Blue Planet Seed Packets – Pollinator-Friendly Wildflower Mix
Celebrate Earth Day or any eco-conscious occasion with our Blue Planet seed packets! One of our most popular designs, these artisan-illustrated packets have been redesigned for the season to inspire a love of nature and pollinator conservation.
Featuring a watercolor-style planet Earth surrounded by flowers, bees, and butterflies, each packet contains a gorgeous mix of pollinator-nurturing wildflower seeds. These seeds are easy to plant and quick to grow, creating a colorful garden that supports bees, butterflies, hummingbirds, and other pollinators while spreading an enduring message of kindness.
Perfect for Earth Day favors, classroom handouts, corporate giveaways, community events, or personal gifts, each packet covers approximately 10 square feet, making it an impactful and eco-friendly choice for any occasion.
Perfect for:
Earth Day or environmental event giveaways
Classroom and school handouts
Corporate, nonprofit, or community events
Gifts for clients, colleagues, friends, and family
Key Features:
Artisan watercolor-style planet Earth design with flowers, bees, and butterflies
Pollinator-friendly wildflower seed mix
Easy to plant, easy to grow
Supports bees, butterflies, hummingbirds, and other pollinators
Covers ~10 sq. ft. per packet
Growing Instructions
In a prepared garden bed, scatter seeds thinly over soil
Lightly press seeds into soil, covering no more than 0.25" deep
Here at Bentley Seed, we only fill our seed packets with the freshest crop NON-GMO seed in our 3rd generation family-owned small business in upstate NY! Our packets are hand-picked for you!
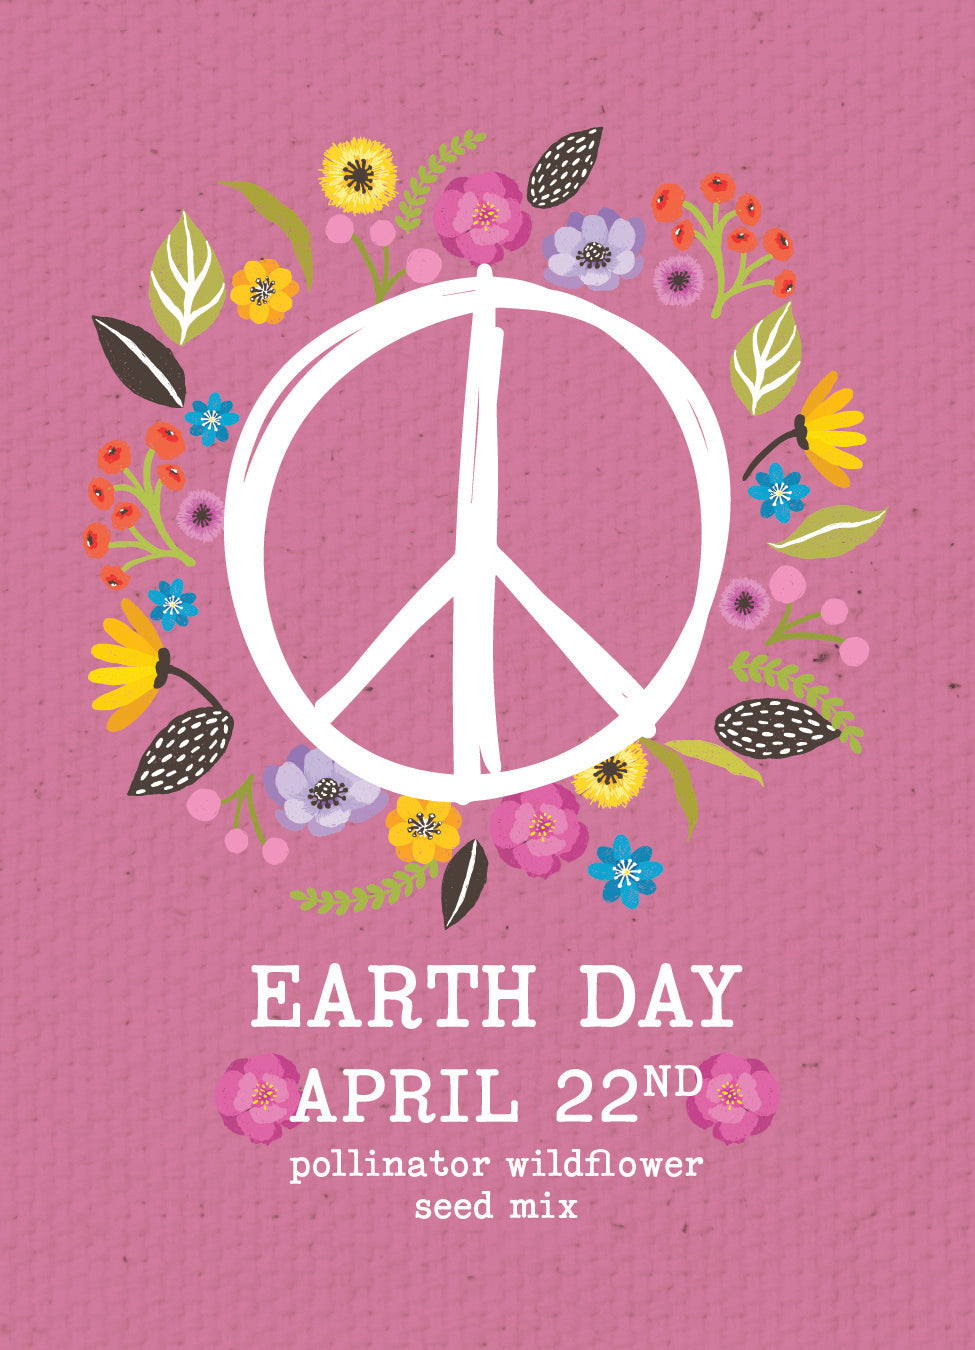
Earth Day Peace and Flowers Seed Packets – Wildflower Mix for Pollinators
Celebrate Earth Day (April 22) with these eco-friendly Peace and Flowers seed packets! Featuring a pink peace sign and floral design, these charming packets make perfect Earth Day favors for classrooms, workplaces, community events, schools, nonprofits, and corporate gatherings.
Each packet can be personalized with your own message, making them ideal for students, colleagues, clients, and guests. Filled with Bentley Seeds’ signature wildflower mix, they grow into a vibrant pollinator-friendly garden that supports honey bees, native bees, hummingbirds, butterflies, and other beneficial insects.
These packets promote pollinator conservation, encourage hands-on environmental education, and inspire sustainable action. Each contains enough seed to cover approximately 10 square feet, making them an affordable and impactful Earth Day giveaway.
Perfect for:
Earth Day classroom handouts
Customer or client appreciation gifts
Corporate or nonprofit Earth Day events
Community gatherings and eco-friendly celebrations
Key Features:
Pink peace sign and floral Earth Day design
Signature pollinator-friendly wildflower mix
Supports bees, butterflies, hummingbirds, and beneficial insects
Personalized back for messages or branded labels
Covers ~10 sq. ft. per packet
Growing Instructions
Prepare a bed of loose soil
Sprinkle seeds in prepared area and cover loosely with soil
Keep the area moist until the plants are about 6" tall
Here at Bentley Seed, we only fill our seed packets with the freshest crop NON-GMO seed in our 3rd generation family-owned small business in Upstate NY! Our packets are hand-picked for you!
Bentley SeedsBlog Recipe Shop
A Beginner's Guide to Canning
How to preserve your fall garden harvest safely
On this page
A Beginner's Guide to Canning
Recipe
There comes a moment in every fall garden when you realize you have more tomatoes, peppers, and cucumbers than you could possibly eat in a week. This is the moment canning was invented for.
Home canning is one of the most rewarding skills a gardener can learn. It turns a seasonal harvest into a pantry full of food you grew yourself and extends the life of everything you worked so hard to produce. But it is also a skill that requires care, attention to safety, and a respect for the science behind it.
This guide will walk you through everything a beginner needs to know to get started safely.
Before Anything Else: A Note on Safety
Canning is a science, not an art. It is very important to use tested recipes. Never use untested recipes or change approved recipes.
The most important safety concern in home canning is botulism, a serious foodborne illness caused by the bacteria Clostridium botulinum. Pressure canning is the only safe way to preserve low-acid foods and eliminate this harmful bacteria. Acid foods such as berries and pickles with a pH of 4.6 or lower may be canned in a water bath canner. Low-acid foods such as vegetables and meats with a pH above 4.6 must be processed in a pressure canner.
The gold standard for home canning safety is the USDA Complete Guide to Home Canning maintained by the National Center for Home Food Preservation. When in doubt, always refer to their guidelines at nchfp.uga.edu.
The Two Methods of Canning
Water Bath Canning -- Used for high-acid foods including tomatoes with added acid, fruits, jams, jellies, pickles, and salsa. This method uses boiling water to process jars and is the most beginner-friendly starting point.
Pressure Canning -- Used for all low-acid foods including vegetables, meats, soups, and beans. Pressure canning reaches temperatures above 240°F which are necessary to destroy botulism spores. This requires a dedicated pressure canner, not a pressure cooker. Always use a tested pressure canner with a working gauge.
What You Need to Get Started
For water bath canning you will need a large stockpot or dedicated water bath canner with a rack, Mason jars in good condition with no chips or cracks, new lids every time (bands can be reused but lids cannot), a jar lifter, funnel, and bubble remover tool, and a kitchen timer and reliable thermometer.
For pressure canning you will additionally need a USDA-recommended pressure canner with a working pressure gauge and a dial gauge tested for accuracy annually at your local cooperative extension office.
What Garden Vegetables Can You Can?
Water Bath (High Acid): Tomatoes with added bottled lemon juice or citric acid, pickled cucumbers and peppers, salsa using a tested recipe only, and tomato sauce with added acid.
Pressure Canning (Low Acid): Green beans, carrots, corn, beets, winter squash, and mixed vegetable soups.
A Special Note on Tomatoes
Tomatoes sit right on the line of acidity, which makes them one of the trickier canning subjects for beginners. Do not adjust pepper or tomato ratios and do not substitute fresh lemon for bottled lemon juice, since fresh varies in acidity. Always add bottled lemon juice or citric acid to every jar of tomatoes before processing, regardless of the recipe.
Step by Step: Water Bath Canning for Beginners
Step 1: Sterilize your jars. Wash jars in hot soapy water and keep them warm until ready to fill. Never fill a cold jar with hot food as it can crack.
Step 2: Prepare your recipe. Use a tested recipe from the USDA, National Center for Home Food Preservation, or Ball Blue Book. Do not improvise or substitute ingredients.
Step 3: Fill your jars. Leave the proper headspace as specified in your recipe, usually a quarter inch to half an inch.
Step 4: Remove air bubbles. Slide a thin non-metallic tool down the inside edge of the jar and work all the way around to release any trapped air pockets. Check your headspace again after, as food often settles. Never use a metal utensil -- it can scratch the glass and lead to cracking during processing.
Step 5: Wipe the rims. Use a clean damp cloth to wipe the rim of each jar before putting on the lid. Any residue can prevent a proper seal.
Step 6: Process your jars. Lower jars into boiling water making sure they are covered by at least one inch of water. Process for the full time specified in your recipe.
Step 7: Check your seals. After 12 to 24 hours press the center of each lid. If it flexes up and down the jar did not seal properly. Refrigerate and use within a week or reprocess within 24 hours.
Storing Your Canned Goods
Store canned goods in a cool, dark, dry place between 50 and 70°F. Rotate first in, first out and aim to use within 12 to 18 months for peak quality. Discard without tasting any jar with a broken seal, mold, off odor, spurting liquid on opening, or unusual color. When in doubt, throw it out. This rule has no exceptions.
A Note on Altitude
Boiling temperatures change at higher elevations. If you live above 1,000 feet, USDA canning safety guidelines require altitude adjustments to processing times and pressures. Check the USDA guide for your specific altitude before processing.
The Best Garden Crops to Start With as a Beginner
Pickled Radishes: Quick, easy, no pressure canner needed and ready in days. A great first canning project.
Tomato Salsa: One of the most satisfying things you can make from your fall harvest. Use a tested NCHFP or USDA recipe only and do not adjust the ratios.
Dill Pickles: Cucumbers, dill, garlic, and vinegar. A classic beginner water bath project that uses up a late-season cucumber harvest beautifully.
Pickled Peppers: A simple high-acid water bath project that works with any pepper variety from your garden.
Trusted Resources for Safe Canning
National Center for Home Food Preservation
USDA Complete Guide to Home Canning -- available as a free PDF download
Ball Blue Book Guide to Preserving -- available at most kitchen stores
Your local university extension office -- a free resource for tested recipes and pressure gauge testing
Recipe of the Month: Easy Fresh Garden Tomato Salsa
Easy Fresh Garden Tomato Salsa
No cook · Ready in 20 minutes
Ingredients
3 cups freshly chopped garden tomatoes
1 cup finely diced onion
1/2 cup chopped green bell pepper
1/4 cup minced fresh cilantro
2 tbsp fresh lime juice
4 tsp chopped fresh jalapeño pepper including seeds
1/2 tsp ground cumin
1/2 tsp kosher salt, or to taste
1/2 tsp ground black pepper
Works with any tomato variety -- heirlooms, beefsteaks, romas, or cherry tomatoes. Keeps in the fridge for up to 3 days. Great on chips, tacos, eggs, or grilled chicken.
Instructions
Prep your garden vegetables -- chop tomatoes, dice onion, chop bell pepper and jalapeño, mince cilantro.
Combine everything in one large bowl and stir until just combined. Do not over mix -- keep it chunky and fresh.
Taste and adjust salt, lime juice, and jalapeño to your liking.
Serve immediately or refrigerate for at least 30 minutes to let the flavors come together.
Pair the Recipe with Your Garden
Heirloom tomatoes, peppers, onions, and cilantro from your fall garden come together effortlessly in a fresh salsa like this. It is one of the simplest and most satisfying ways to put your harvest to work before canning season begins.
Final Thoughts: Close the Loop Between Seed and Jar
Canning is one of the most empowering things a gardener can do. It closes the loop between the seed you planted in spring and the jar you open in January. Start simple. Use tested recipes. Follow the USDA guidelines. And enjoy the very satisfying moment when you hear that lid pop and know your harvest is safe for the season ahead.
Browse all fall planting seeds at Bentley Seeds. Non-GMO, open-pollinated, and trusted by American gardeners since 1975.
Questions? Contact the Bentley Seeds team at 518-677-2603 or sales@bentleyseeds.com.
What to Plant in September for a Fall Harvest
The garden is not done yet — not even close
On this page
What to Plant in September for a Fall Harvest
Recipe
Most people think the garden is winding down in September. They pull up the last of the tomatoes, let the herbs go to seed, and call it a season. But experienced gardeners know something the rest of the neighborhood does not: September is one of the best planting months of the entire year.
Cool-season crops actually prefer the temperatures that September brings. The soil is still warm from summer, which helps seeds germinate quickly, but the air is cooling down in exactly the way that kale, spinach, lettuce, radishes, and carrots love. What you plant this month can be on your table by October and November -- sometimes even later depending on where you live.
This post covers exactly what to get in the ground right now, how long each crop takes to harvest, and closes with a recipe that uses four of these crops together in one pot: a deeply satisfying Autumn Harvest Minestrone that will make you genuinely grateful you kept gardening past Labor Day.
Why September Is a Great Time to Plant
The window feels short but it is more generous than most people realize. Cool-season crops grow fast, tolerate light frost, and in many cases taste better after a cold snap -- the chill converts starches to sugars, which is why fall kale and carrots are noticeably sweeter than their summer counterparts.
Check your first frost date. In most of the northeastern and mid-Atlantic US, the first frost falls somewhere between mid-October and early November. That gives you 6 to 8 weeks of solid growing time from a September planting.
Focus on fast-maturing varieties. Days to maturity matters more in September than any other month. Stick to varieties that finish in 30 to 60 days.
Plant in a sunny spot. Days are getting shorter, so give your fall crops the sunniest location in your garden to compensate.
Water consistently after planting. Germination is fast in warm September soil, but seedlings need steady moisture in their first two weeks.
What to Plant in September
Kale — Days to harvest: 50 to 65 daysKale is one of the most cold-hardy vegetables you can grow. It handles frost without flinching and many gardeners find that a light freeze actually improves the flavor. Plant now and you can be harvesting well into November in most climates. It is also one of the most productive crops per square foot you can grow -- one plant keeps producing leaves for weeks. Use it in soups, salads, sauteed as a side dish, or blended into a pesto. It is the backbone of the Minestrone recipe below. Shop kale seeds.
Spinach — Days to harvest: 40 to 50 daysSpinach is one of the fastest cool-season crops and one of the most cold-tolerant. It can survive temperatures down to the mid-20s with a little protection and will keep producing cut-and-come-again leaves right up until a hard freeze. September-planted spinach often produces a second flush of growth in early spring if it overwinters successfully. Use it fresh in salads, wilted into pasta, or stirred into soups and eggs. Shop Spinach, Bloomsdale Savoy seeds.
Lettuce — Days to harvest: 45 to 60 daysLettuce bolts in summer heat but absolutely thrives in cool fall weather. September-planted lettuce grows slowly and evenly, producing tender, flavorful leaves that are noticeably better than anything you can grow in July. It does not tolerate a hard freeze, so plan to harvest before temperatures consistently drop below 28°F or cover with a row cover to extend the season. Shop lettuce varieties.
Radishes — Days to harvest: 22 to 30 daysRadishes are the fastest crop in the fall garden and a great choice if you are nervous about the window. You can plant them in mid-September and have something to eat by mid-October. They are also a good companion for slower crops -- plant them between rows of carrots and kale to make use of every inch of space. Try them raw with butter and salt, quick-pickled, thinly sliced into salads, or roasted until sweet and tender. Shop radish seeds.
Carrots — Days to harvest: 60 to 75 daysCarrots are the most patient crop on this list and the most rewarding. They need the full window, so get them in the ground in the first week of September for the best results. Like kale, their flavor improves significantly after a frost. They also store incredibly well right in the ground, which means you can leave them and harvest as needed well into late fall. Shop Carrot, Danvers Half Long seeds.
Quick Planting Tips
Kale: Direct sow or transplant. Space plants 12 to 18 inches apart. Thin seedlings when they reach 3 inches tall.
Spinach: Direct sow in rows, about half an inch deep. Thin to 3 to 4 inches apart once sprouted. Succession plant every two weeks for a longer harvest.
Lettuce: Scatter seeds lightly and press into the soil. Does not need to be buried deep -- lettuce needs light to germinate. Keep soil consistently moist until seedlings appear.
Radishes: Direct sow half an inch deep, one inch apart. Thin to 2 inches once sprouted. Do not let them stay in the ground past maturity or they turn woody.
Carrots: Direct sow in loose, well-worked soil. Thin to 3 inches apart once seedlings are 2 inches tall. Carrots need loose soil to form straight roots -- break up any clumps before planting.
Recipe of the Month: Autumn Harvest Minestrone
Extending Your Fall Garden Season
Row covers and frost cloth: A lightweight row cover can protect your crops from frost and extend your harvest by three to four weeks in most climates.
Cold frames: A simple cold frame built from an old window and four boards can keep lettuce, spinach, and kale producing well into December in many parts of the country.
Succession planting: Do not plant everything at once. Stagger your lettuce, spinach, and radish plantings by two weeks to keep a steady harvest coming.
Mulch heavily: Once temperatures start dropping consistently, a layer of straw or shredded leaves around your plants helps insulate the soil and protect roots.
September gardening is one of the quieter pleasures of the growing season. The summer rush is over, the garden is not yet put to bed, and there is something genuinely satisfying about putting seeds in the ground when the rest of the neighborhood has stopped paying attention to theirs. The harvest that follows -- sweet fall carrots, tender kale after the first frost, crisp October lettuce -- is some of the best eating of the whole year.
Get those seeds in the ground this month. Your October self will be very glad you did.
Autumn Harvest Minestrone
Serves 6–8 · Total time: 45 minutes
Ingredients
3 tablespoons extra virgin olive oil
1 medium yellow onion, diced
4 cloves garlic, minced
2 medium carrots, peeled and diced
2 stalks celery, diced
2 tablespoons tomato paste
1 can (14 oz) diced tomatoes
1 can (14 oz) cannellini beans, drained and rinsed
1 can (14 oz) kidney beans, drained and rinsed
6 cups vegetable or chicken broth
1 teaspoon dried oregano
1 teaspoon dried thyme
1/2 teaspoon red pepper flakes (optional but recommended)
1 Parmesan rind (optional -- a game changer for depth of flavor)
1 cup small pasta such as ditalini or elbow macaroni
2 cups fresh kale, stems removed and roughly chopped
2 cups fresh spinach
Salt and black pepper to taste
Fresh parsley, grated Parmesan, and good olive oil for serving
Instructions
Build the base. Heat olive oil in a large heavy-bottomed pot over medium heat. Add onion and a generous pinch of salt and cook for 6 to 8 minutes until softened and just starting to turn golden. Add garlic and cook another 2 minutes. Do not rush this step.
Add the vegetables. Add diced carrots and celery and stir to combine. Cook for 4 to 5 minutes until they begin to soften slightly.
Add tomato paste. Push the vegetables to the side and add tomato paste directly to the bottom of the pot. Let it cook undisturbed for about 90 seconds until it darkens slightly and smells fragrant. Then stir it into the vegetables.
Add liquids and seasoning. Pour in the diced tomatoes and broth. Add oregano, thyme, red pepper flakes, and the Parmesan rind if using. Bring to a gentle boil.
Add beans and simmer. Add both cans of beans, reduce heat to medium-low, and simmer uncovered for 15 minutes.
Cook the pasta. Add the pasta directly to the soup and cook for 8 to 10 minutes until just al dente. Pull off the heat when the pasta still has a slight bite.
Add the greens. Remove the Parmesan rind if using. Stir in the chopped kale and cook for 3 minutes. Then stir in the spinach and cook just 1 minute more.
Taste and finish. Season generously with salt and black pepper. Ladle into bowls and top with fresh parsley, grated Parmesan, and a drizzle of good olive oil. Serve with crusty bread.
Tips
The Parmesan rind is optional but do not skip it if you have one. Save them in the freezer whenever you finish a block of Parmesan.
Do not overcook the greens. Kale goes in with a few minutes left and spinach goes in at the very end.
Make it ahead. This soup tastes significantly better the next day. Cook the pasta separately and add when reheating.
Freeze it. Minestrone freezes beautifully for up to 3 months. Leave the pasta out if you plan to freeze -- add fresh pasta when you reheat.
Make it heartier. Add a diced zucchini with the carrots and celery, or stir in cooked farro or barley instead of pasta.
Make it vegan. Skip the Parmesan rind and use nutritional yeast as a finishing topper instead of grated cheese.
Pair the Recipe with Your Garden
Kale, spinach, carrots, and onions from a September planting come together naturally in a soup like this. Simple, hearty recipes turn a fall harvest into some of the best weeknight dinners of the year and give you a reason to keep the garden going long after summer ends.
Final Thoughts: Keep Planting
Get those seeds in the ground this month. Your October self will be very glad you did.
Browse all fall planting seeds at Bentley Seeds. Non-GMO, open-pollinated, and trusted by American gardeners since 1975.
Questions about fall planting in your area? Contact the Bentley Seeds team.
Bentley SeedsBlog Recipe Shop
6 Ways to Use Up Your August Tomato Harvest
The best problem gardening gives you
On this page
6 Ways to Use Up Your August Tomato Harvest
Recipes
If you are a home gardener in August, you know the feeling. You walk outside to check on your plants and suddenly there are twelve ripe tomatoes where there were none yesterday. Then twelve more the day after that. The kitchen counter fills up. The windowsill fills up. You start leaving bags of tomatoes on your neighbor's doorstep and pretending you do not know who left them.
This is the best problem gardening gives you.
The good news is that tomatoes at peak ripeness are one of the most versatile ingredients in any kitchen. You do not need complicated recipes or a lot of time. Most of the ideas below come together in under 30 minutes and use ingredients you probably already have on hand -- many of them growing right alongside your tomatoes.
Here are six of our favorite ways to use up a big August harvest.
A Quick Note on Varieties
Not all tomatoes behave the same way in the kitchen. Here is a quick guide to which Bentley Seeds varieties work best for each type of recipe:
Tomato, Roma -- Best for roasting, sauce, and bruschetta. Meaty with low moisture and holds its shape.
Tomato, Beefsteak -- Best for slicing, caprese, and sandwiches. Big, juicy, and impressive on a plate.
Tomato, Brandywine -- Best for caprese and fresh eating. Heirloom flavor that stands on its own.
Tomato, Cherry or Grape varieties -- Best for blistering, salads, and pasta. Sweet and fast to cook.
Growing any of these? You are about to put them to very good use.
The Seeds Behind the Harvest
Every recipe above starts with a seed. These are the Bentley Seeds varieties worth planting if you want an August kitchen full of possibilities:
Tomato, Roma -- The workhorse of the garden. Perfect for roasting, sauce, and bruschetta.
Tomato, Beefsteak -- Big slicing tomatoes ideal for caprese and fresh eating.
Tomato, Brandywine -- Heirloom flavor that stands completely on its own.
Basil, Genovese Sweet -- The herb that ties every one of these recipes together.
Pepper, Jalapeno -- Essential for the salsa and great for so much more.
Cilantro -- Fast-growing and ideal for summer herb gardens.
Browse all vegetable seeds and herb seeds at Bentley Seeds. Non-GMO, open-pollinated, and trusted by American gardeners since 1975.
A garden full of tomatoes in August is not a problem. It is an opportunity. These six recipes give you a week's worth of meals, snacks, and shareable dishes using what is already growing in your backyard. And the best part is that every single one tastes better when the tomatoes came from your own soil.
Save this post for when the harvest hits. You will need it.
Recipe 1
Roasted Tomato Caprese Salad
Best with: Roma, Beefsteak, or Brandywine
Ingredients
2 pounds ripe Roma tomatoes, halved
3 cloves garlic, minced
3 tablespoons extra virgin olive oil
1 tablespoon balsamic vinegar
1 teaspoon fresh thyme leaves (or dried oregano)
Salt and black pepper to taste
1 pound fresh mozzarella, sliced
1 cup fresh basil leaves, torn
Balsamic glaze for drizzling
Flaky sea salt to finish
Instructions
Preheat oven to 400°F. Toss halved tomatoes with garlic, olive oil, balsamic vinegar, thyme, salt, and pepper until well coated.
Arrange cut side up on a parchment-lined baking sheet. Roast 45 to 55 minutes until softened, caramelized, and slightly wrinkled at the edges.
Let cool for 10 minutes. Arrange on a platter, alternating with mozzarella slices and torn basil.
Drizzle with olive oil and balsamic glaze. Finish with flaky salt and serve.
Make-ahead tip: Roasted tomatoes can be made a day ahead and stored in the fridge. Assemble the platter just before serving.
Grow it yourself: Basil, Genovese Sweet and Tomato, Roma from Bentley Seeds.
Recipe 2
Quick Bruschetta
Best with: Roma, cherry, or any firm ripe tomato from the garden
Ingredients
2 cups fresh tomatoes, diced small
2 cloves garlic, 1 minced for the topping and 1 whole for rubbing the bread
3 tablespoons fresh basil, thinly sliced
2 tablespoons extra virgin olive oil
1 teaspoon red wine vinegar
Salt and black pepper to taste
1 baguette, sliced and toasted
Instructions
Combine diced tomatoes, minced garlic, basil, olive oil, and red wine vinegar in a bowl. Season generously with salt and pepper. Let sit at room temperature for at least 10 minutes.
Toast baguette slices until golden and crisp. While still warm, rub each slice with the cut side of the whole garlic clove.
Spoon tomato mixture generously over each slice and serve immediately.
Tip: Do not skip the garlic rub on the bread. It is a small step that adds a lot of flavor.
Grow it yourself: Basil, Genovese Sweet from Bentley Seeds.
Recipe 3
Blistered Cherry Tomato Pasta
Best with: Cherry or grape tomatoes
Ingredients
2 cups cherry tomatoes
4 cloves garlic, thinly sliced
3 tablespoons olive oil
Pinch of red pepper flakes
Salt and black pepper to taste
8 ounces pasta of your choice
Fresh basil to finish
Parmesan for serving
Instructions
Cook pasta in well-salted boiling water until al dente. Reserve half a cup of pasta water before draining.
While pasta cooks, heat olive oil in a large skillet over medium-high heat. Add cherry tomatoes in a single layer and cook without stirring for 2 to 3 minutes until they start to blister and char on the bottom.
Add garlic and red pepper flakes. Toss and cook another 2 minutes until tomatoes burst and release their juices.
Add drained pasta to the skillet. Toss to coat, adding a splash of pasta water to loosen the sauce. Season to taste.
Finish with torn fresh basil and plenty of Parmesan.
Grow it yourself: Basil, Genovese Sweet from Bentley Seeds.
Recipe 4
Fresh Garden Salsa
Best with: Roma or any firm ripe tomato
Ingredients
3 cups fresh tomatoes, roughly chopped
1 small white onion, finely diced
1 to 2 jalapenos, seeded and minced (adjust to taste)
2 cloves garlic, minced
1/4 cup fresh cilantro, chopped
Juice of 1 lime
1/2 teaspoon cumin
Salt to taste
Instructions
Combine all ingredients in a bowl and stir to combine.
Taste and adjust -- more lime for brightness, more jalapeno for heat, more salt to bring everything together.
Let sit at room temperature for 15 minutes before serving to let the flavors develop.
Store covered in the refrigerator for up to 4 days.
Tip: For a smokier salsa, char the tomatoes and jalapenos directly over a gas flame or under the broiler for a few minutes before chopping.
Grow it yourself: Jalapeno and Cilantro from Bentley Seeds.
Recipe 5
Slow Roasted Tomatoes in Olive Oil
Best with: Roma or plum tomatoes
Ingredients
3 pounds tomatoes, halved lengthwise
4 cloves garlic, thinly sliced
Fresh thyme or rosemary sprigs
1/2 cup extra virgin olive oil, plus more for storing
Salt and black pepper to taste
Instructions
Preheat oven to 275°F. Arrange tomatoes cut side up on a baking sheet.
Tuck garlic slices and herb sprigs between the tomatoes. Drizzle generously with olive oil and season with salt and pepper.
Roast for 2 to 2.5 hours until the tomatoes are deeply concentrated, shrunken, and sweet but not dried out.
Let cool completely. Transfer to a clean jar and cover with olive oil. Refrigerate for up to two weeks.
Tip: The olive oil left in the jar after the tomatoes are gone is incredible for dipping bread or dressing a salad.
Grow it yourself: Tomato and Rosemary from Bentley Seeds.
Recipe 6
Simple Fresh Tomato Soup
Best with: Any ripe tomatoes -- great for imperfect or slightly overripe ones
Ingredients
3 pounds ripe tomatoes, roughly chopped
1 medium onion, roughly chopped
4 cloves garlic, smashed
2 tablespoons olive oil
1 cup vegetable or chicken broth
1 teaspoon sugar (balances acidity)
Salt and black pepper to taste
Fresh basil for serving
Cream or butter for finishing (optional)
Instructions
Heat olive oil in a large pot over medium heat. Add onion and cook 5 minutes until softened. Add garlic and cook another minute.
Add chopped tomatoes and broth. Bring to a simmer and cook uncovered for 20 minutes until tomatoes have completely broken down.
Use an immersion blender to puree until smooth. Alternatively transfer in batches to a blender.
Stir in sugar and season generously with salt and pepper. Add a swirl of cream or a pat of butter if desired.
Serve with torn fresh basil and crusty bread on the side.
Freezing tip: Let cool completely, then ladle into freezer-safe containers or zip-lock bags. Keeps for up to 3 months. A taste of August in the middle of January.
Grow it yourself: Tomato, Basil, Genovese Sweet, and Onion from Bentley Seeds.
Pair the Recipes with Your Garden
Fresh tomatoes, herbs, and peppers make summer cooking even better, especially when they come straight from the garden. Simple recipes like these turn a backyard harvest into a week's worth of meals and give you another reason to keep checking on the plants every morning.
Final Thoughts: The Best August Ingredient Is Already in Your Backyard
A garden full of tomatoes in August is not a problem. It is an opportunity. These six recipes give you a week's worth of meals, snacks, and shareable dishes using what is already growing in your backyard. And the best part is that every single one tastes better when the tomatoes came from your own soil.
Save this post for when the harvest hits. You will need it.
Shop Bentley Seeds and grow something worth cooking with this season.
Choosing a selection results in a full page refresh.
Opens in a new window.
Cindy Allen
Great Seeds!
All the seeds I get from Bentley are great. Not only do we sell their seeds in our Nursery, but we personally use them in our own gardens and they always germinate well and we raise good strong plants.
Asparagus, Mary Washington Seed Packets
LORI J TAYLOR
FAST GERMINATION
I purchase these great seeds in mid summer. Being that i am on a fix income these seeds was within my price. These seeds germinated in 2 days with no problem which was amazing to me. I planted outside towards the middle of September. I will order again being that was the first time ordering from a company i knew nothing about.
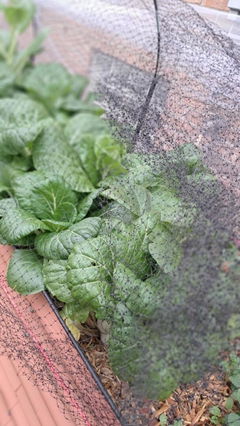
I took chance, Bentley Seed Company did not fail me. I had to fight with the squirrels but i kept a bird netting on Pak Choi. Great harvest November 16, 2024.
Cabbage, Pak Choi Seed Packets
Nicolasa Sarmiento
Seeds
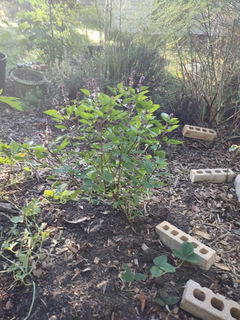
It came out bushy. I like the looks so green and bright.
Basil, Lemon Seed Packets
Nicolasa Sarmiento
Basil seeds
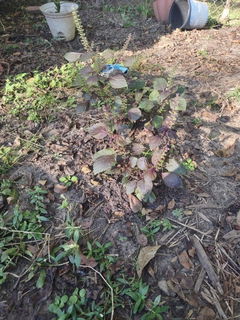
I am not sure this is purple basil. I planted several types of basil for pest control.
Basil, Purple Opal Seed Packets
Judi Hofmeister
LOVE These Seed Packets!
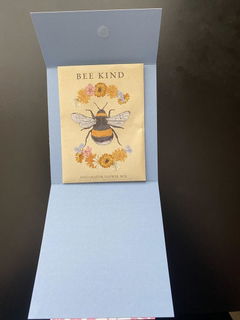
What a wonderful way to package these wildflower seeds! They make great gifts! With these fun packages we can truly pollinate the world. So fun!
I didnt get a shipping update until day of delivery. It prolly has nothing to do with Bentley but shopify app. In my parts bentley seed has a great reputation for quality and super excited for next planting season.